SREM V3 User Manual
Table of Contents
1. Manage Access of Users and their roles
Manage Roles
1.1 Creating New Roles
1.2 Editing and Deleting Roles
1.3 Enabling and Disabling Roles
Manage Users
1.4 Viewing Existing Users
1.5 Creating New Users
1.6 Editing and Deleting Users
2. Building Forms in the "Manage Form" Section
2.1 Single Step Form
2.2 Building a New Form
2.3 Adding Form Fields and Layout
2.4 Multi-Step Forms
2.5 Creating Multi-Step Forms
2.6 Adding Pages and Names to Pages
2.7 Adding relevant information to the required fields.
3. CRM (Customer Relationship Management)
3.1 Manage Leads
3.2 Adding New Leads
3.3 Enabling and Disabling Leads
3.4 Deleting Leads
3.5 Uploading Bulk Data
3.6 Performing Mass Actions
3.7 Exporting Leads to Excel
3.8 Choosing Displayed Columns
4. Manage Team
4.1 Adding a New Team
4.2 Editing Team Details
4.3 Adding Team Members
4.4 Editing Team Members
4.5 Deleting Team Members
5. Manage Lead Priority and Assignment
5.1 Creating New Assignment Rules
5.2 Enabling and Disabling Rules
5.3 Deleting Assignment Rules
-
Building a Form in the "Manage Form" Section
-
For Single step Form
-
Log in to the application using your credentials
- Navigate to the main menu
- Click on the "Manage Form" Section
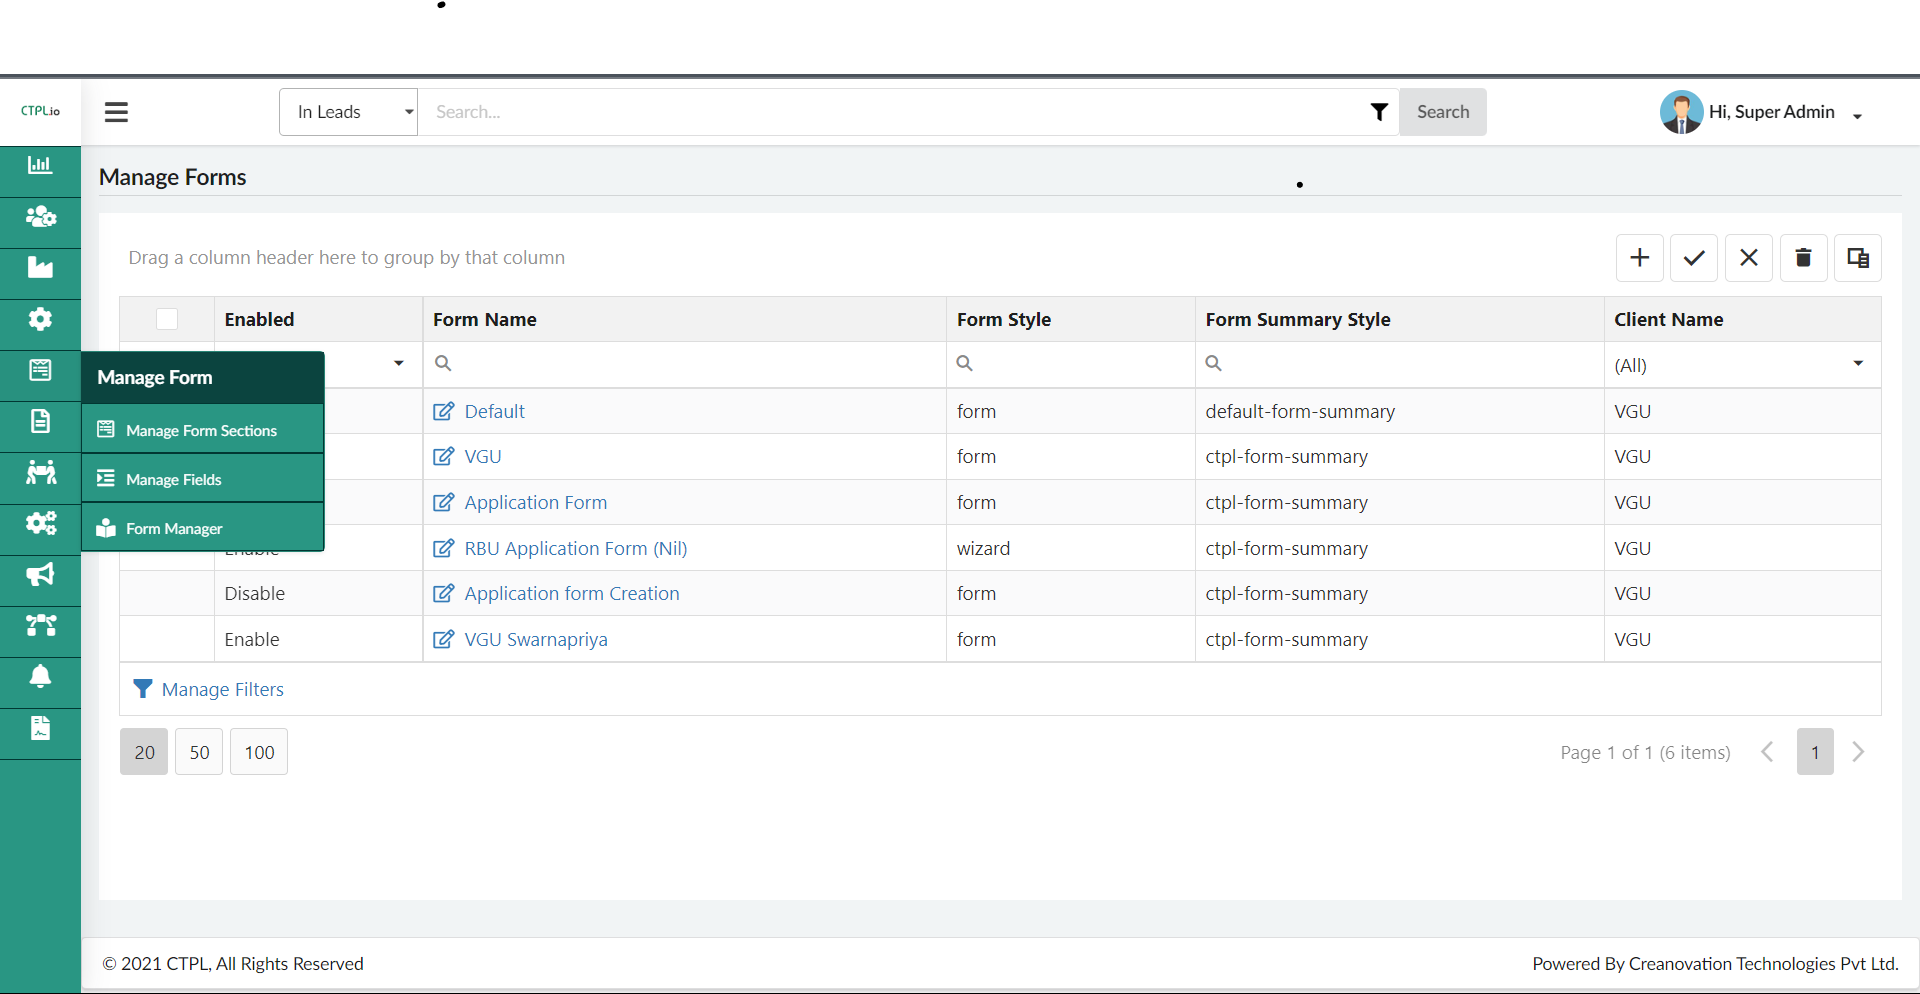
- Look for an option named "Form Manager".
- Click on "Form Manager”
-
Building a New Form
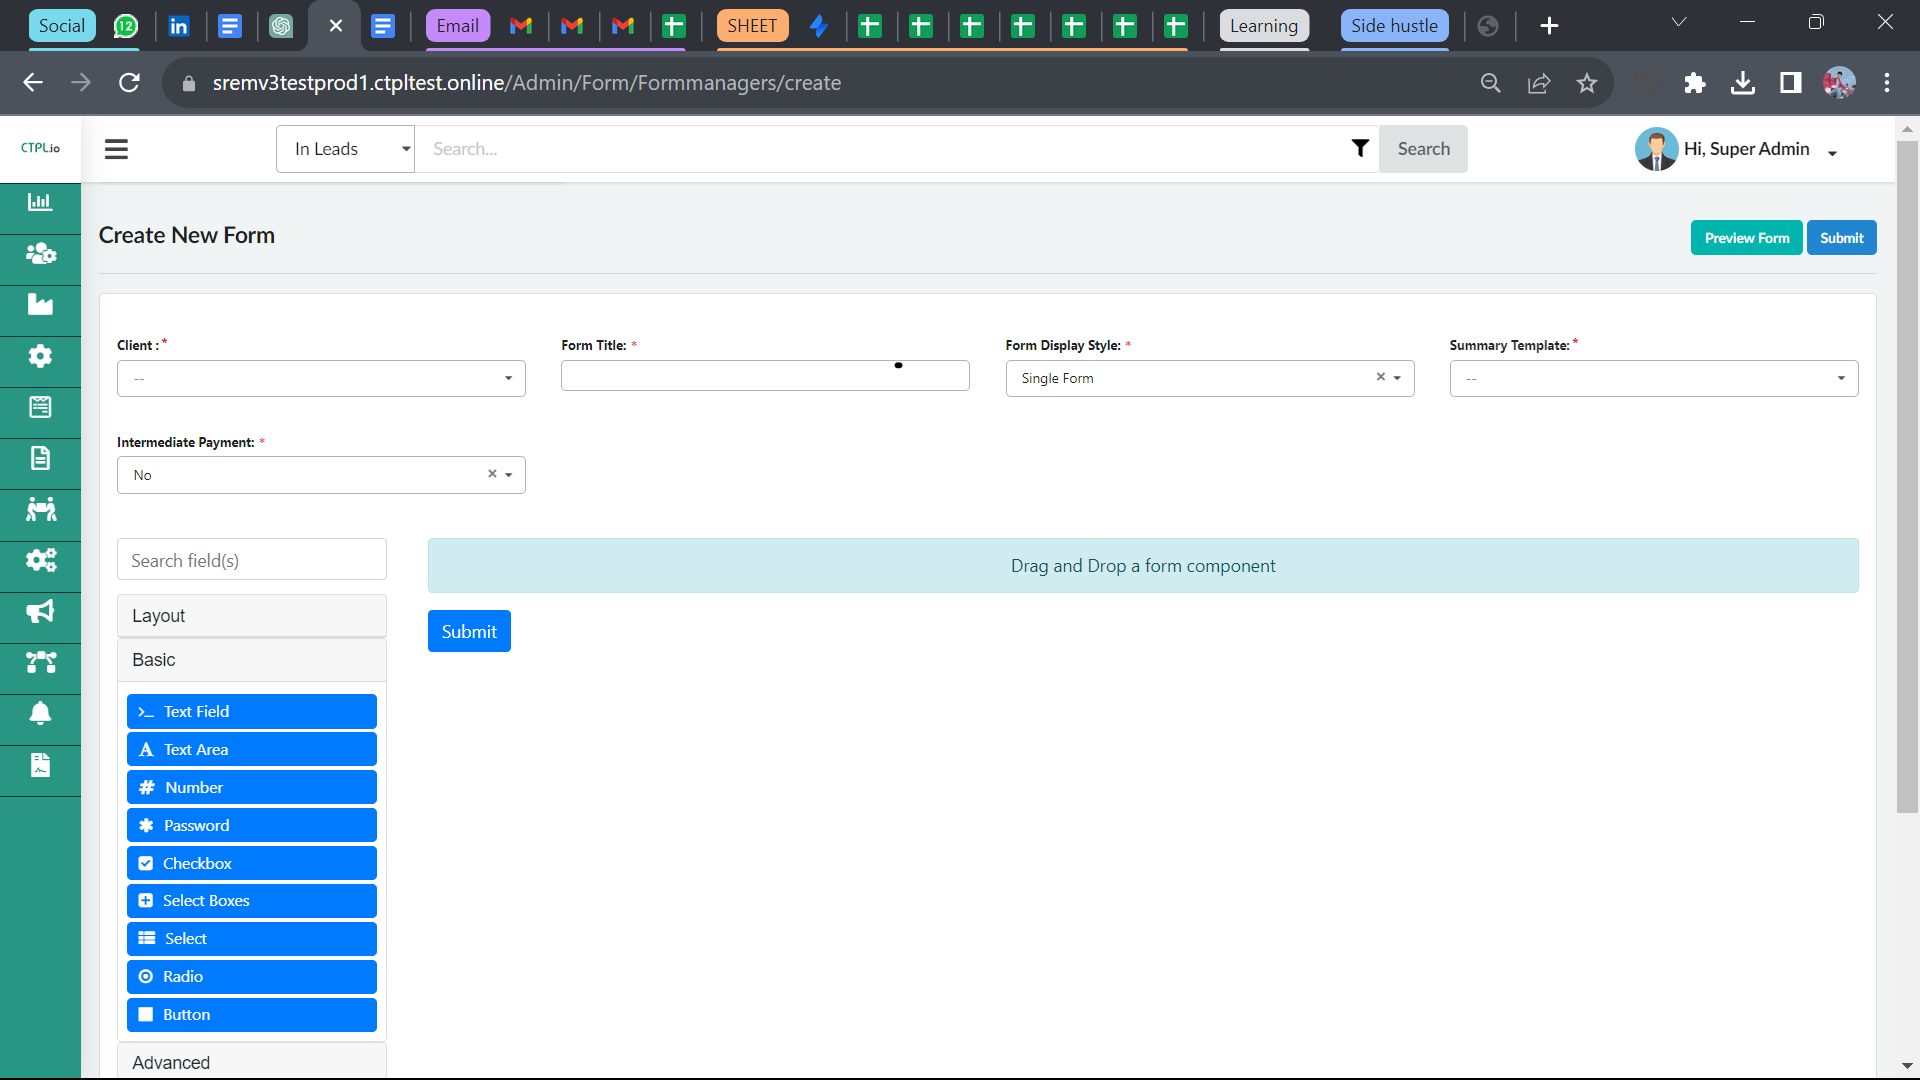
- In the "Form Manager" section, locate and click on the "Create New Form(which is + button on the top right".
- Once clicked, this page will appear.
-
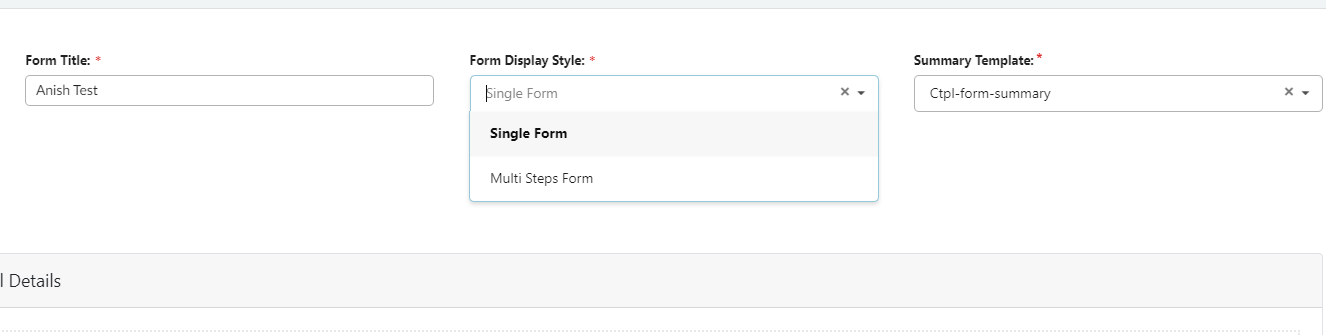
Enter the client name from the dropdown menu.
- Enter a suitable name for your form in the provided field form title.
- You can choose form display style (single step or multi step form).
- In the summary title, select the form type (Ctpl form summary, default form summary, etc. )
- Add intermediate payment type : Yes or No
-
Adding Form Fields and Layout
-
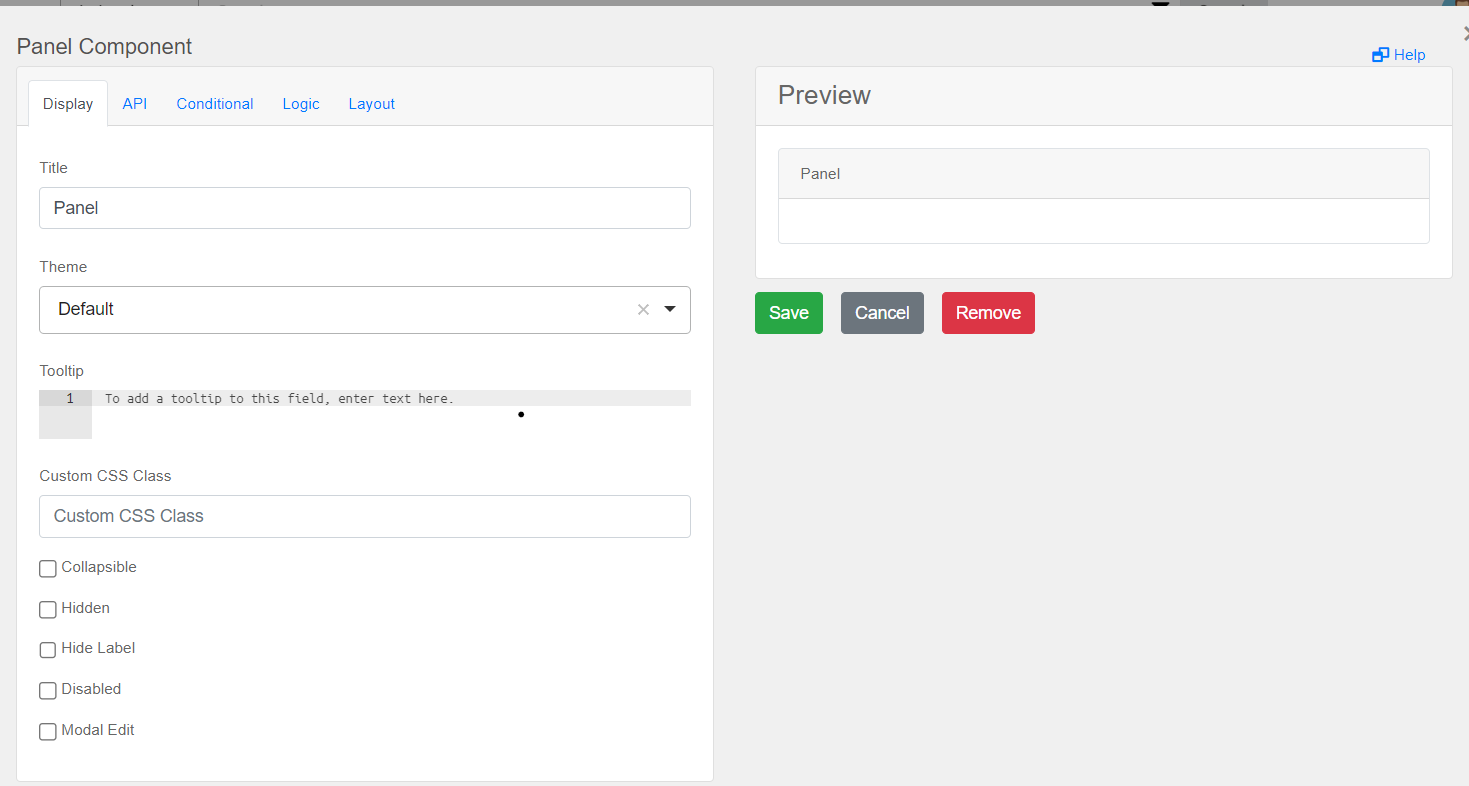
The very first thing we are going to do is, we will give the layout of the form by adding “panel”. For eg(personal details or educational details)
-
This will get open, once you drag the panel in the form layout.
-
You need to give the name of the panel in the place of title.
-
You can also customise them as per your needs.
- From the sidebar, you'll find different options to add different types of fields (e.g., text, dropdown, checkbox, etc.) to build the form according to your needs.
- Drag and drop the required fields.
-
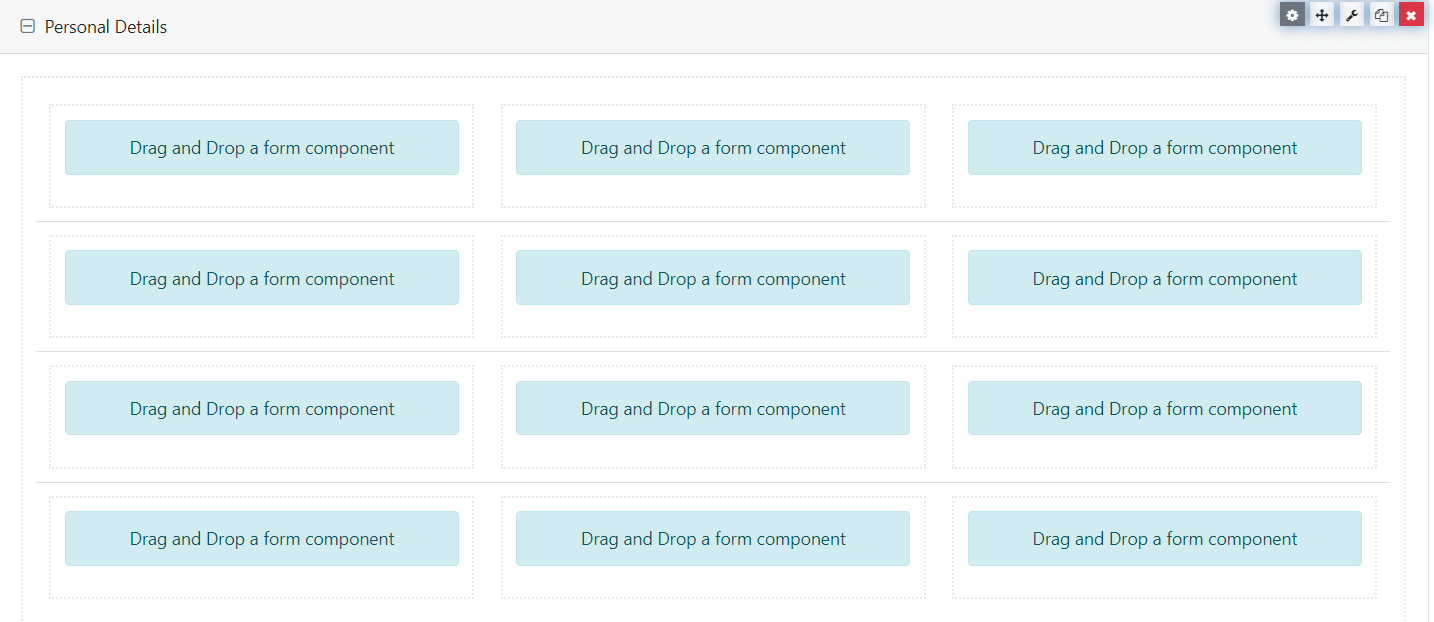
It should look like this after adding the panel and a table to add other fields.
-
To locate the table, visit the Layout section below the panel where there is a field table.
-
You can customise the table as well, to manage the rows and columns.
-
You may also set the width of the column and put multiple validations. By clicking edit button there itself
-
Now drag and drop the necessary fields inside the table.
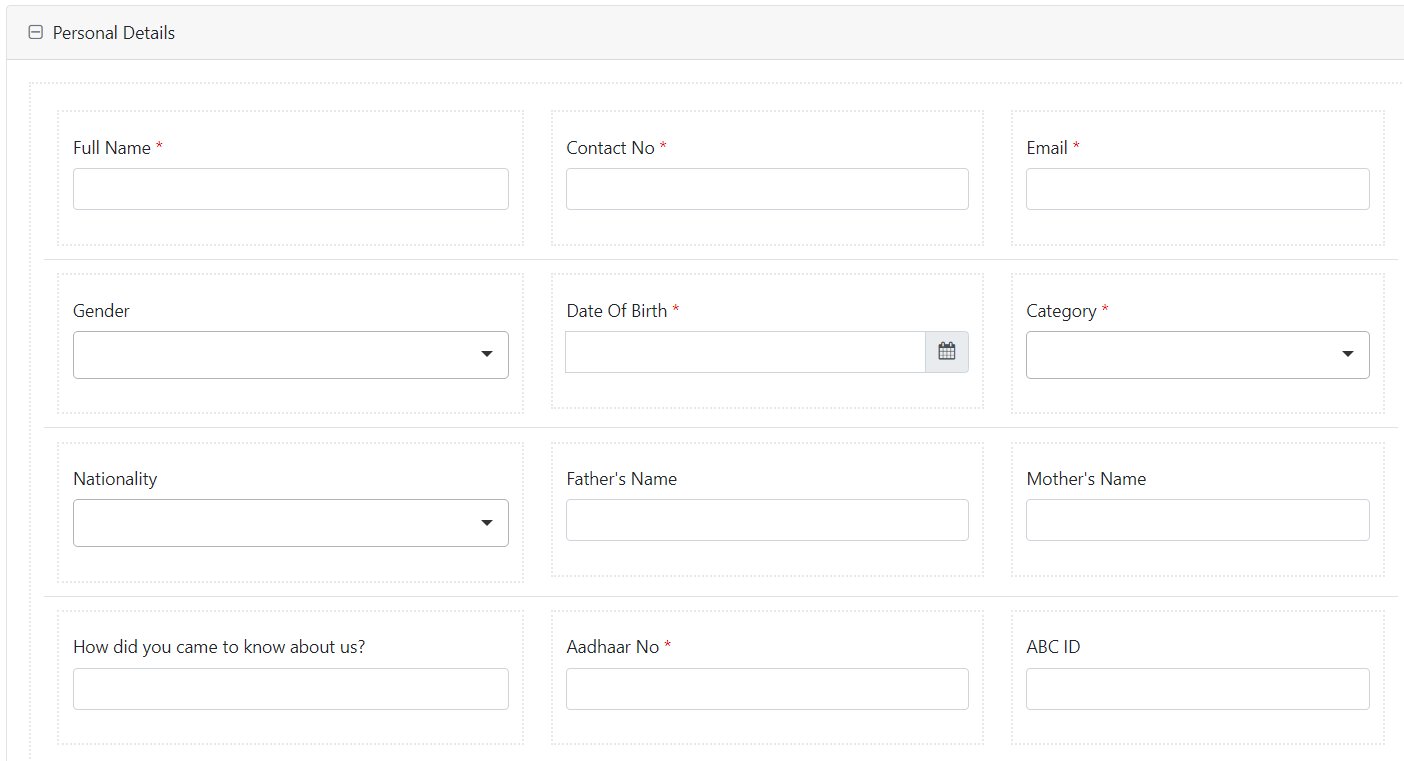
 After successfully adding the necessary fields of personal details, it will look like this.
-
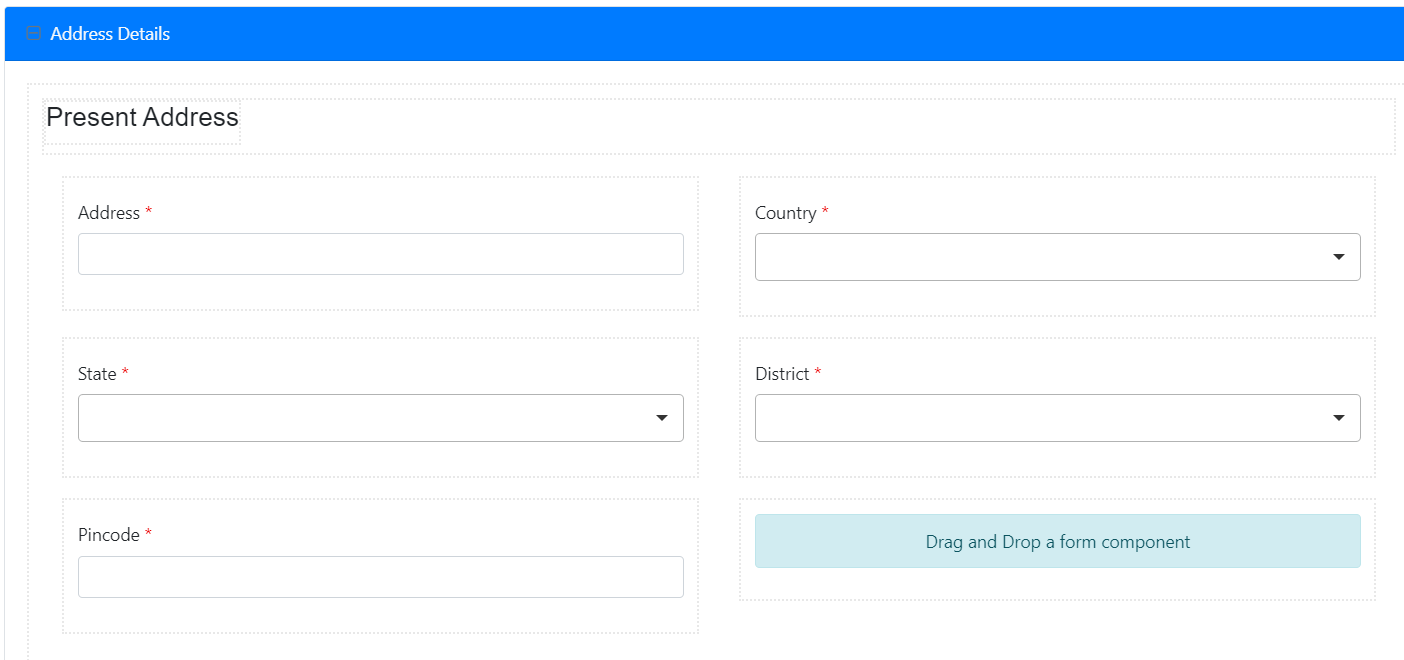
Now moving into the next field which would be address details
- To add the address details in the form again we need to drag and drop the panel and name that panel as an address details.
- Again add the number of columns and rows, as per your needs.
- Then just simply drag and drop the required fields you want to set eg, state, district, country, pincode From the sidebar.
- After completing the address details section and adding all the related fields it will look like this
-
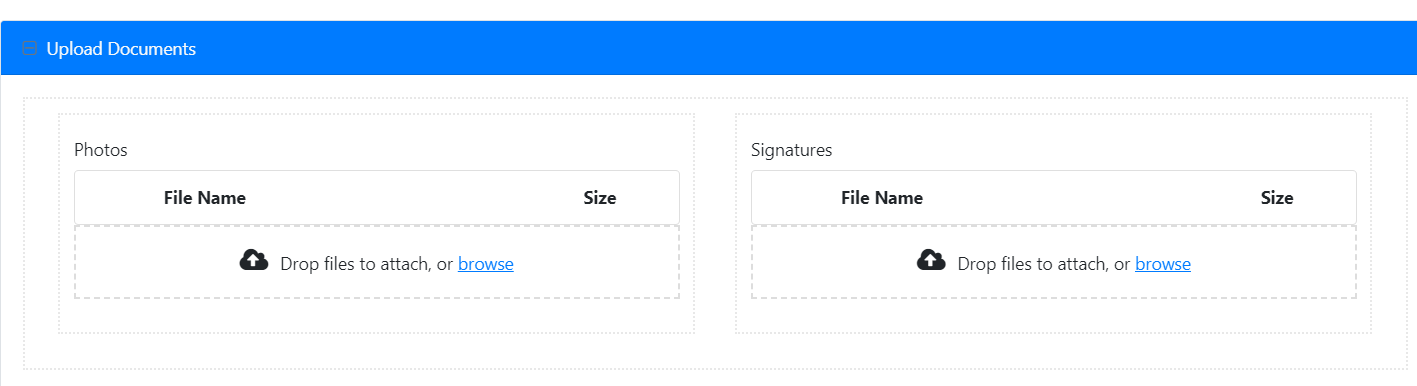
Now Moving to the next Field which will probably be the documents uploading section.
-
Create a panel of upload documents.
-
Then drag and drop the file option from the premium section in this panel.
-
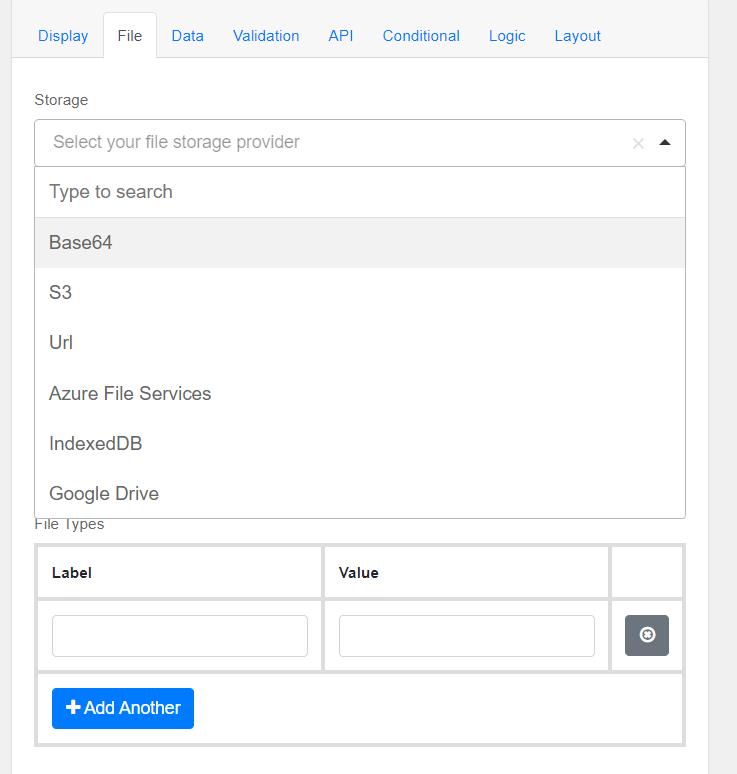
Then edit the upload section and this will appear
-
Go to file and select the storage type from dropdown menu
-
Select URL so that you can browse from your computer.
-
After adding the upload document section you need to add the declaration.
-
By adding the panel name as declaration
-
Drag and drop the field set to add the declaration.
-
Below that add a radio button, again drag and drop the radio buttons and give them value Yes or No.
-
Once done, drag and drop the submit button from the sidebar.
Once you've added all the necessary fields, save your progress.
In the "Form Manager>>Manage Form," you can see the form you've created listed. Click on the form's entry to manage its settings, view submissions, and make edits.
Now moving forward we are going to take a look at multi step forms.
-
Earlier we made a single step form using all the elements present in the sidebar.
-
To make a multi step form the very first thing we need to do is, click on the multi step instead of single step from the dropdown menu where we select the form display Style.
-
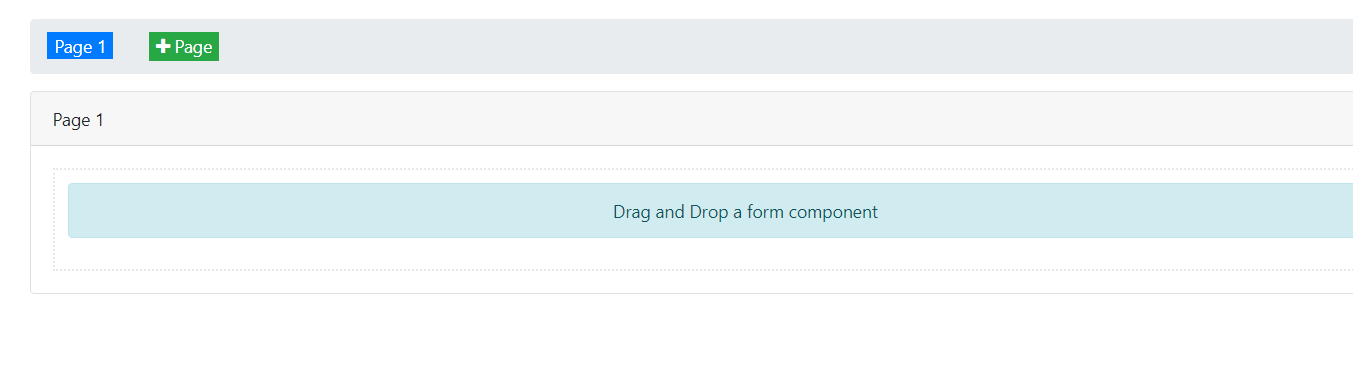
As soon as we select the multi step from the dropdown menu.
-
Something of this type will come in front of the screen.
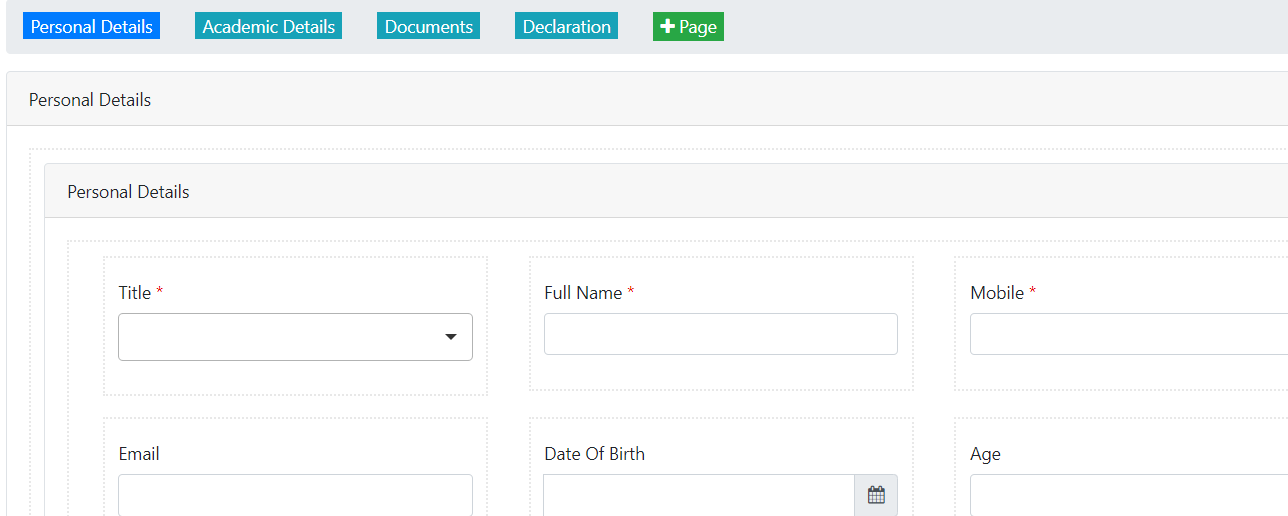
 Now going forward we need to add the page and add names of the different pages. For eg( the first page is let’s say Personal details, Academic details, and so on.)
 -
After adding the page, it should look like this.
-
The process for adding all the fields is the same.
-
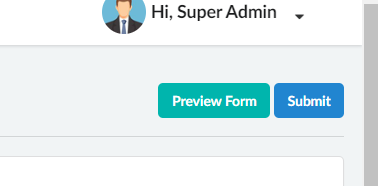
Once we complete adding all the required details, we can submit the form.
-
With this submit button on the top right corner.
The next Feature we are going to talk about is “CRM”
-
On clicking the crm from the side bar multiple options arrive in front of us.
-
The first one is Manage leads.
- From this we can access all the leads which are there in the software.
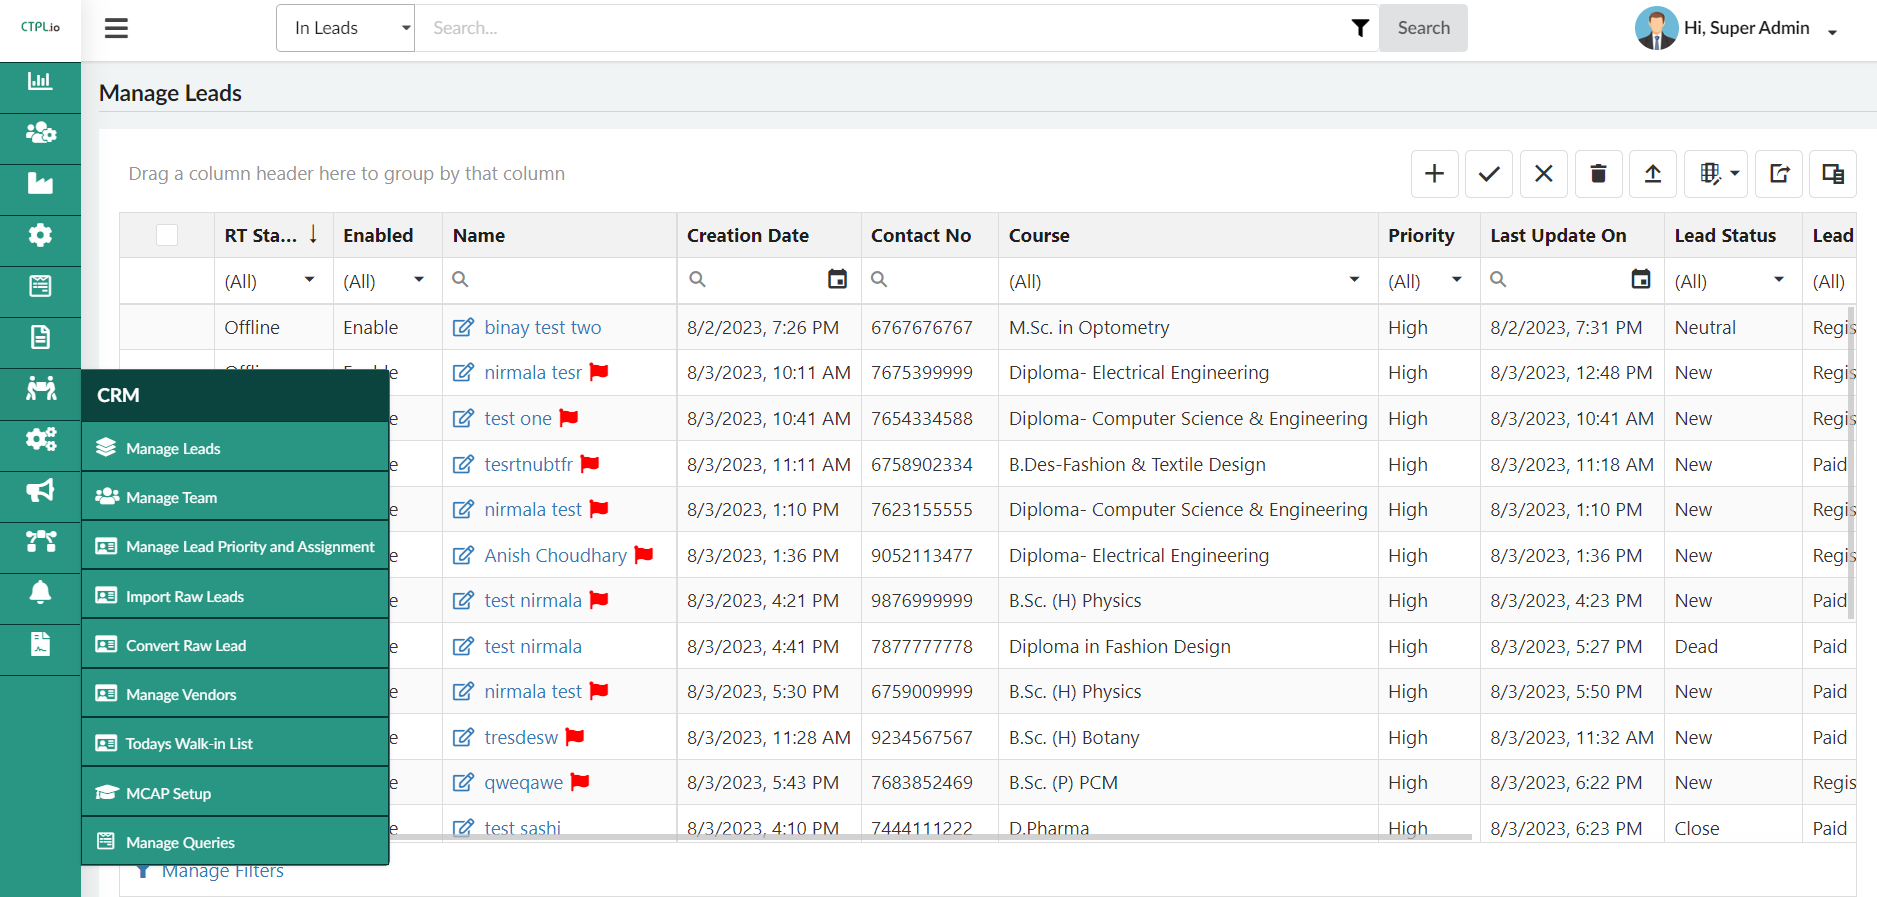
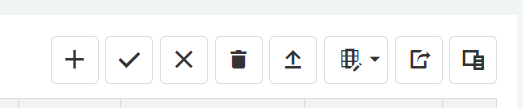
- As we can see this on the top right side
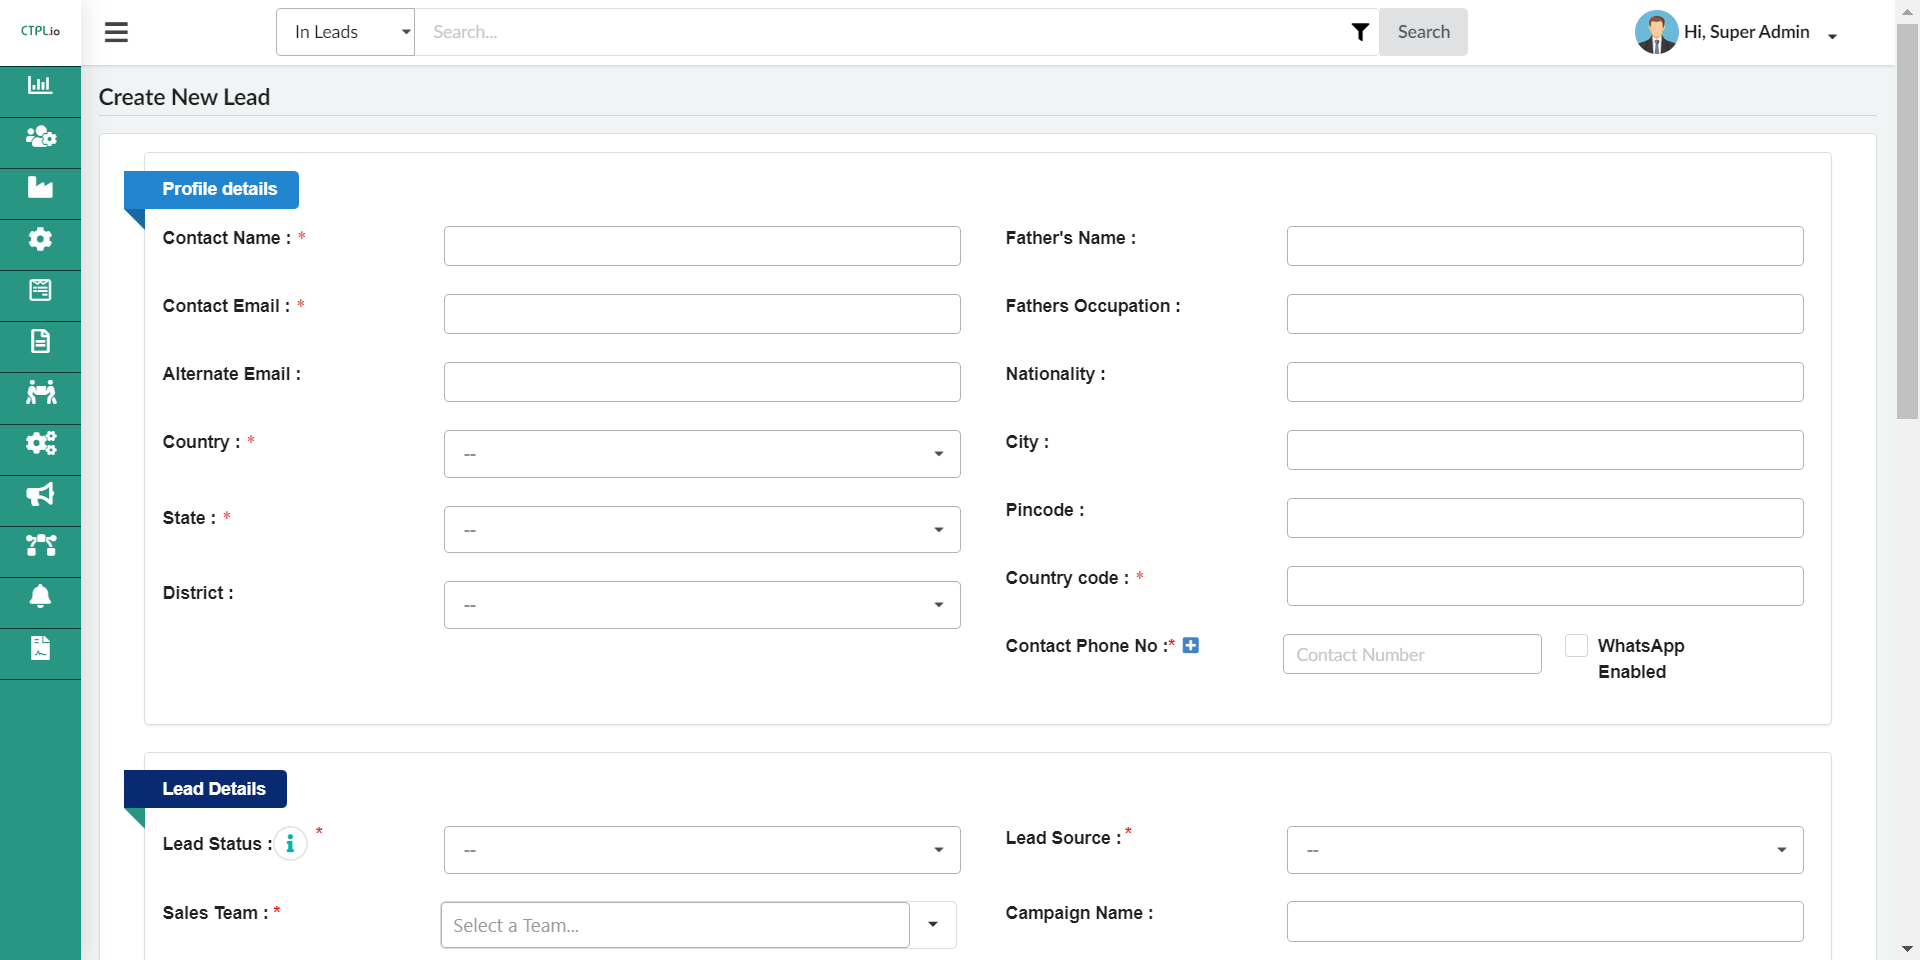
- The + button indicates that if we want to add a new lead from the admin side then you can click on the plus button and this page gets open.
- From this we can access all the leads which are there in the software.
-
Adding all the required information, lead gets created and you can save the information by clicking on the submit button.
-
The next Icon which is a tick mark.
- That enables the leads, if any leads are marked disabled then we can enable it from here.
-
The next Icon is disabled.
- By clicking on the disable button after selecting the leads. We can disable the leads.
-
Next is delete Icon.
- If we want to delete a lead or multiple leads then at first we need to select the leads and then we can delete the selected leads.
-
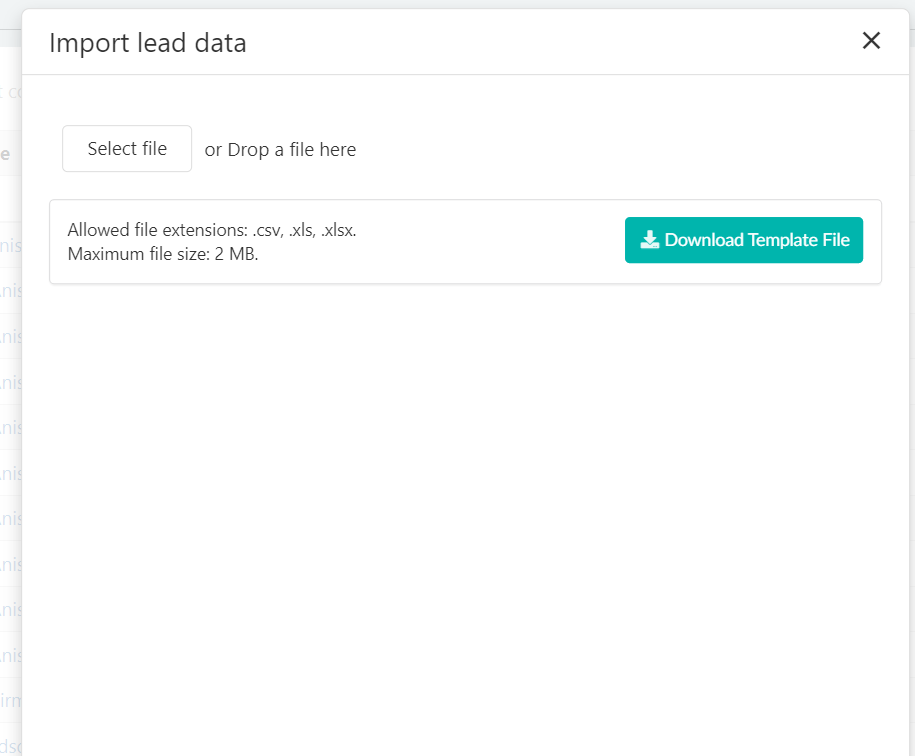
The next icon is Upload bulk data ( which is in the upward direction arrow).
- Once we click that we get this page.
- Once we click that we get this page.
-
From this we can select a file which we need to upload here or we can also drag and drop from the system to upload here.
-
Only .csv, .xls, .xlsx extension files are allowed to upload the data.
-
As we can see one more button we see over here in the download template, by clicking on that button we get an excel sheet of leads.
-
The next Icon is mass action
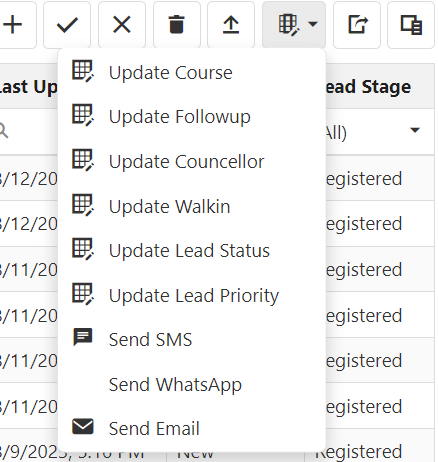
- As we can see multiple options are there
- To perform any of these actions, we can select the leads and update whatever we need to do from the above options.
-
The next icon is export to excel.
- From this we can export all the leads into an excel file.
-
The next icon is column chooser.
- We can choose the column which we want to show on the screen.
-
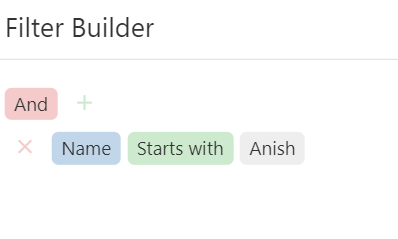
Then we have filter options in the CRM to manage leads.
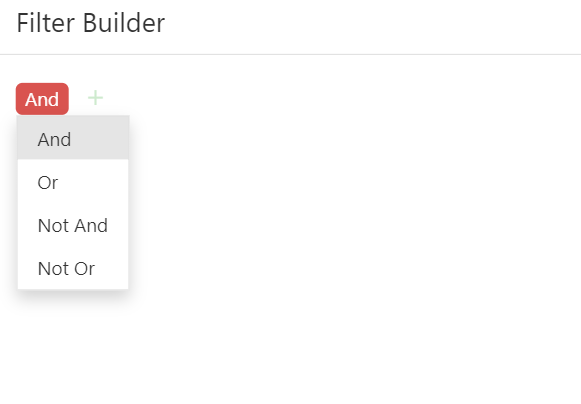
- In this we can have different conditions to sort the leads according to the needs.
- Like this
-
We can also edit the leads or check the complete profile of the leads by clicking on their name in the manage lead.
- Once we click on their name we get this page on the screen.
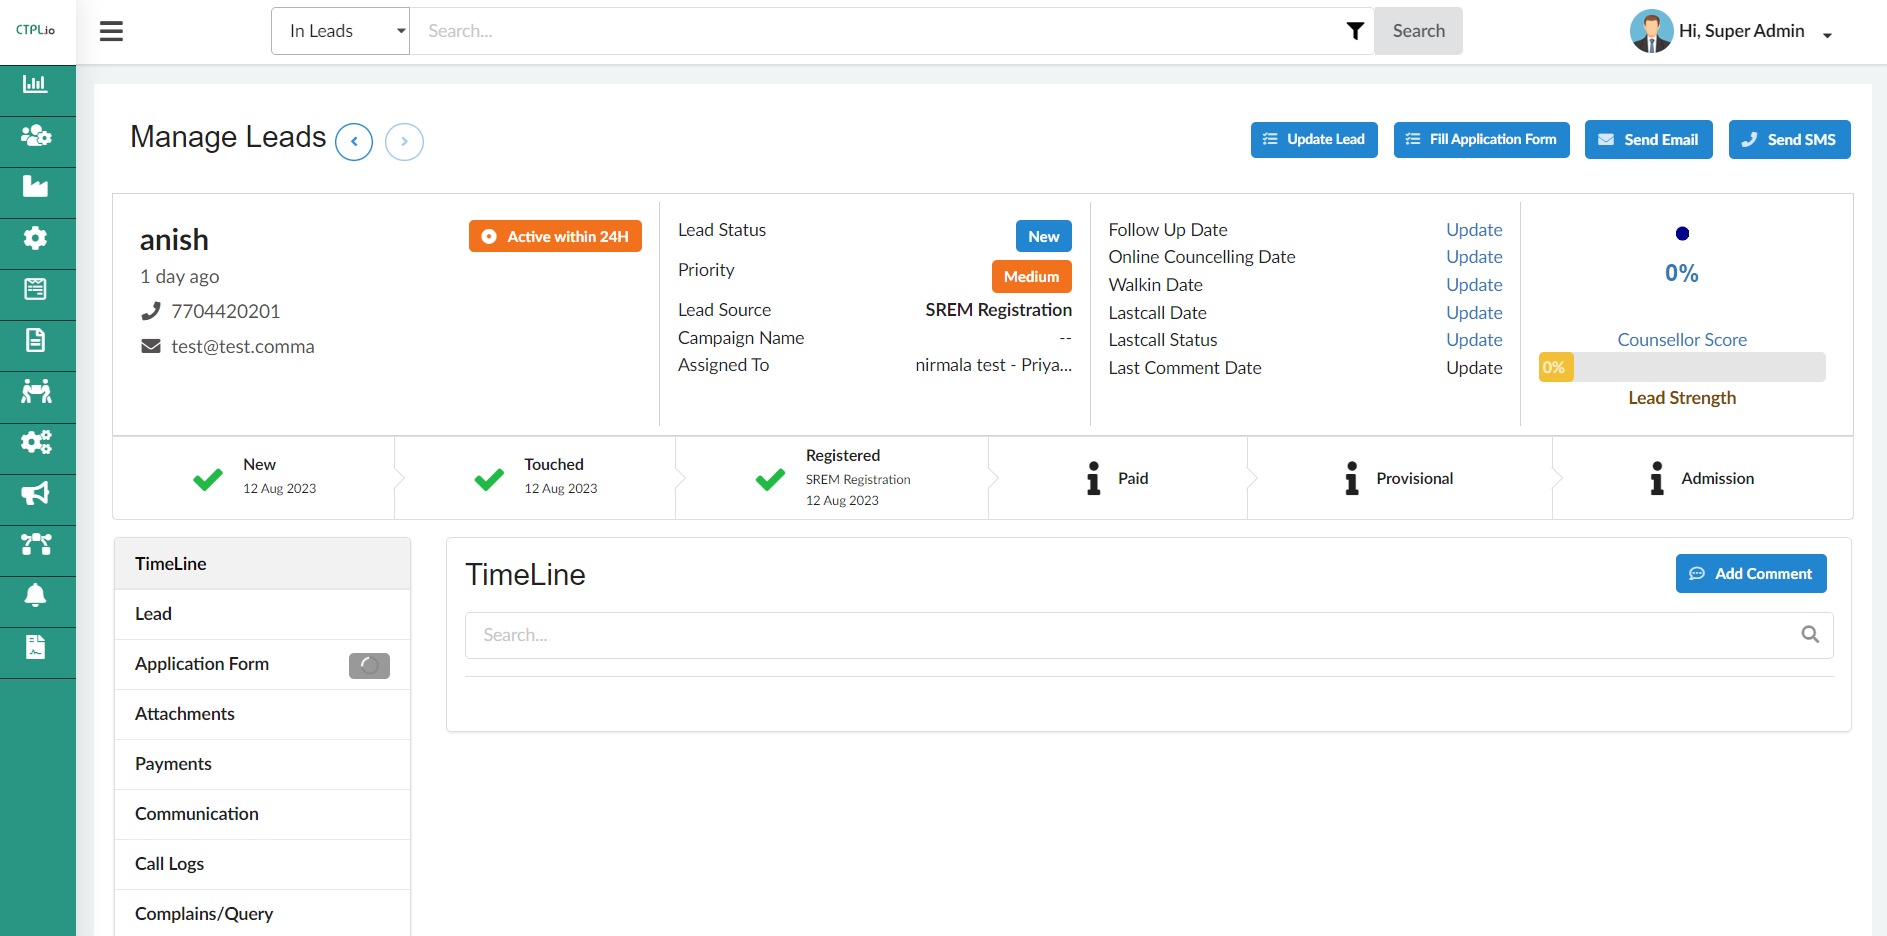
- Once we click on their name we get this page on the screen.
-
Here we can update the lead by clicking on the update lead button.
-
Counsellor can fill the application form, in case the student is not able to fill or any other condition.
-
The Counselor can check the form summary, if the form is already filled.
-
We can send email directly to the lead from the send email button.
-
We can send sms directly to the lead from the send sms button.
-
We can check the stage of the lead.
-
We can check all the attachments which are uploaded by the student.
-
We can check the call log history in the call logs option.
-
We can check all the payments related receipts in the payments option.
-
We can generate the payment from here.
-
We can update follow-up date, online counselling date, walk-in date, last call date, last call status.
-
We can add comments and it will appear in the timeline section of the lead in this page only.
-
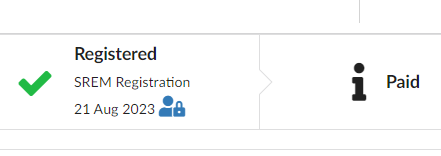
Counsellor can reset the password of the student by clicking on the lock button below registered.

-
Accessing Manage Team Log in to your CRM account. Navigate to the dashboard. Click on the "Manage Team" option.
-
Adding a New Team Click on the "Add New Team" button. Provide a team name. Select the client associated with the team. Choose the active status (Yes/No). Click "Save" to create the new team.
-
Editing an Existing Team On the Manage Team page, find the team you want to edit. Click on the "Edit" button next to the team's details. Make the necessary changes (team name, client, active status). Click "Save" to update the team's information.
-
Adding a Team Member Locate the team to which you want to add a member. Click on the team's name or details. Inside the team page, click the "Add Team Member" button. Fill in the team member's details (name, role, contact info). Click "Save" to add the team member.
-
Editing a Team Member On the team's page, find the team member you want to edit. Click on the "Edit" button next to the team member's details. Update the team member's information. Click "Save" to apply the changes.
-
Deleting a Team Member Locate the team member to delete. Click on the "Delete" button next to their details. Confirm the deletion when prompted.
-
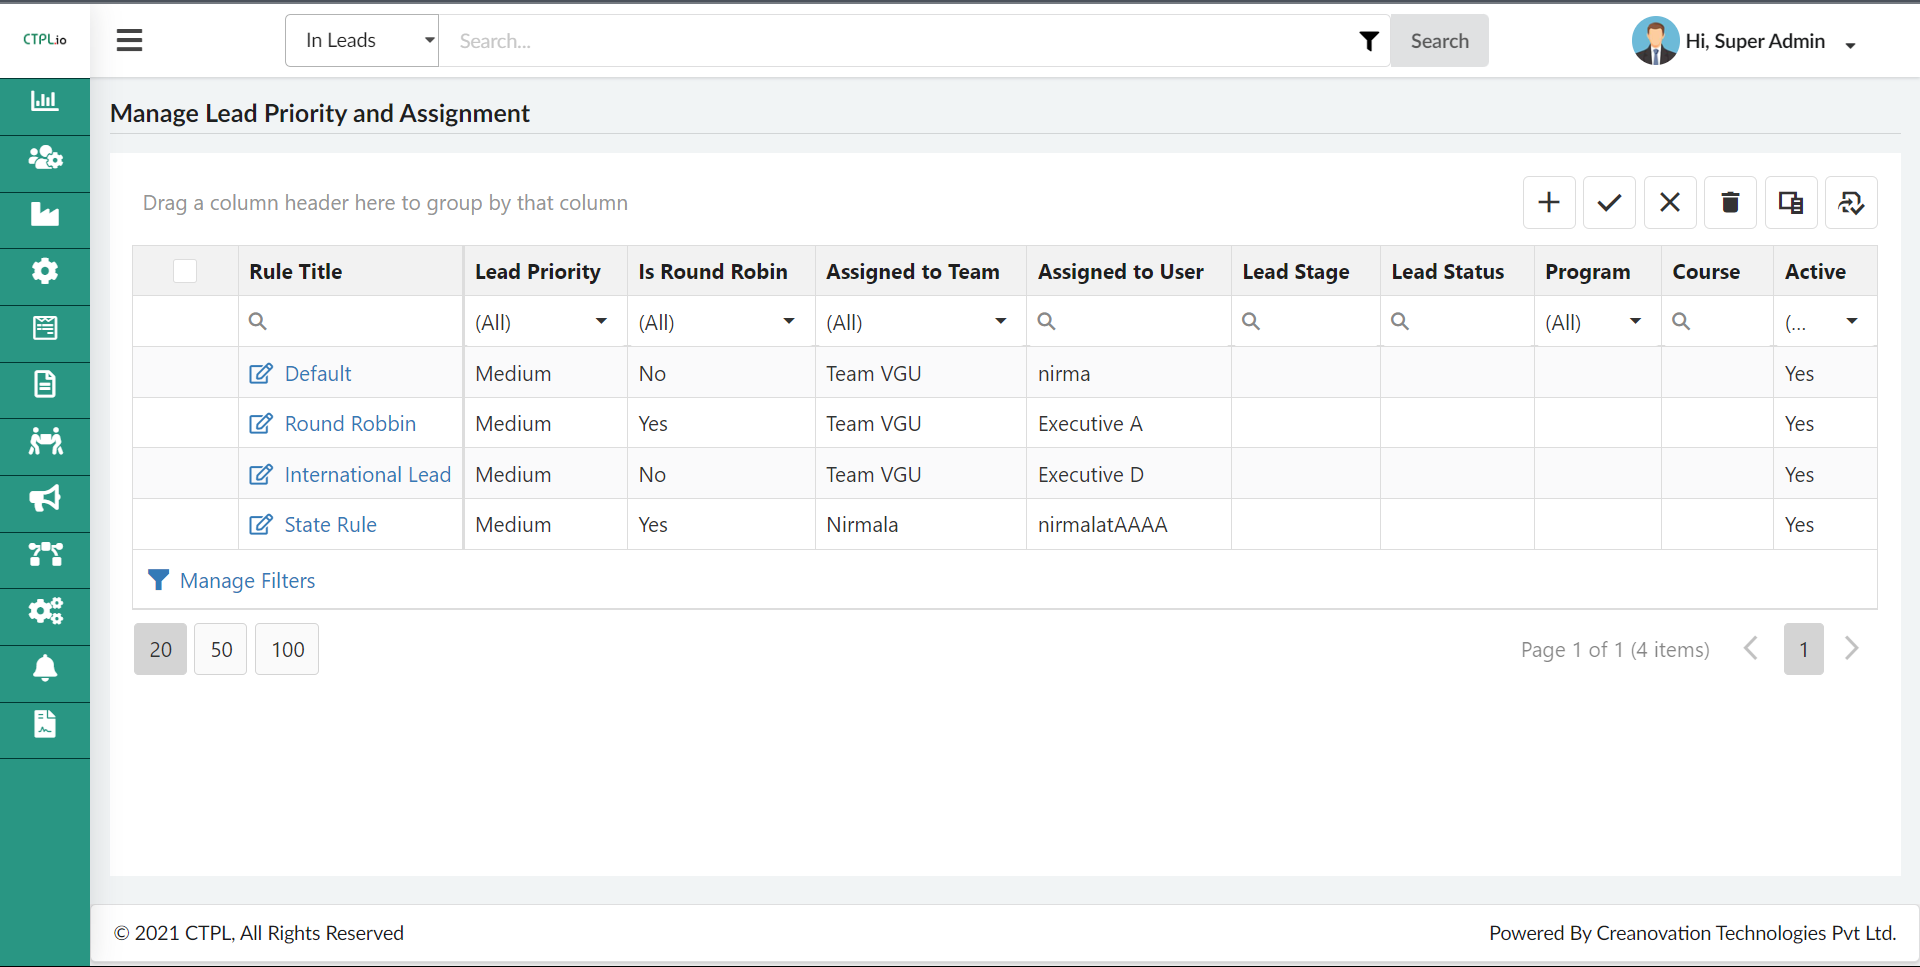
Accessing Manage Lead Priority and Assignment Log in to your account. Navigate to the CRM “manage lead priority and assignment”. Click on the "Manage Lead Priority and Assignment" option.
-
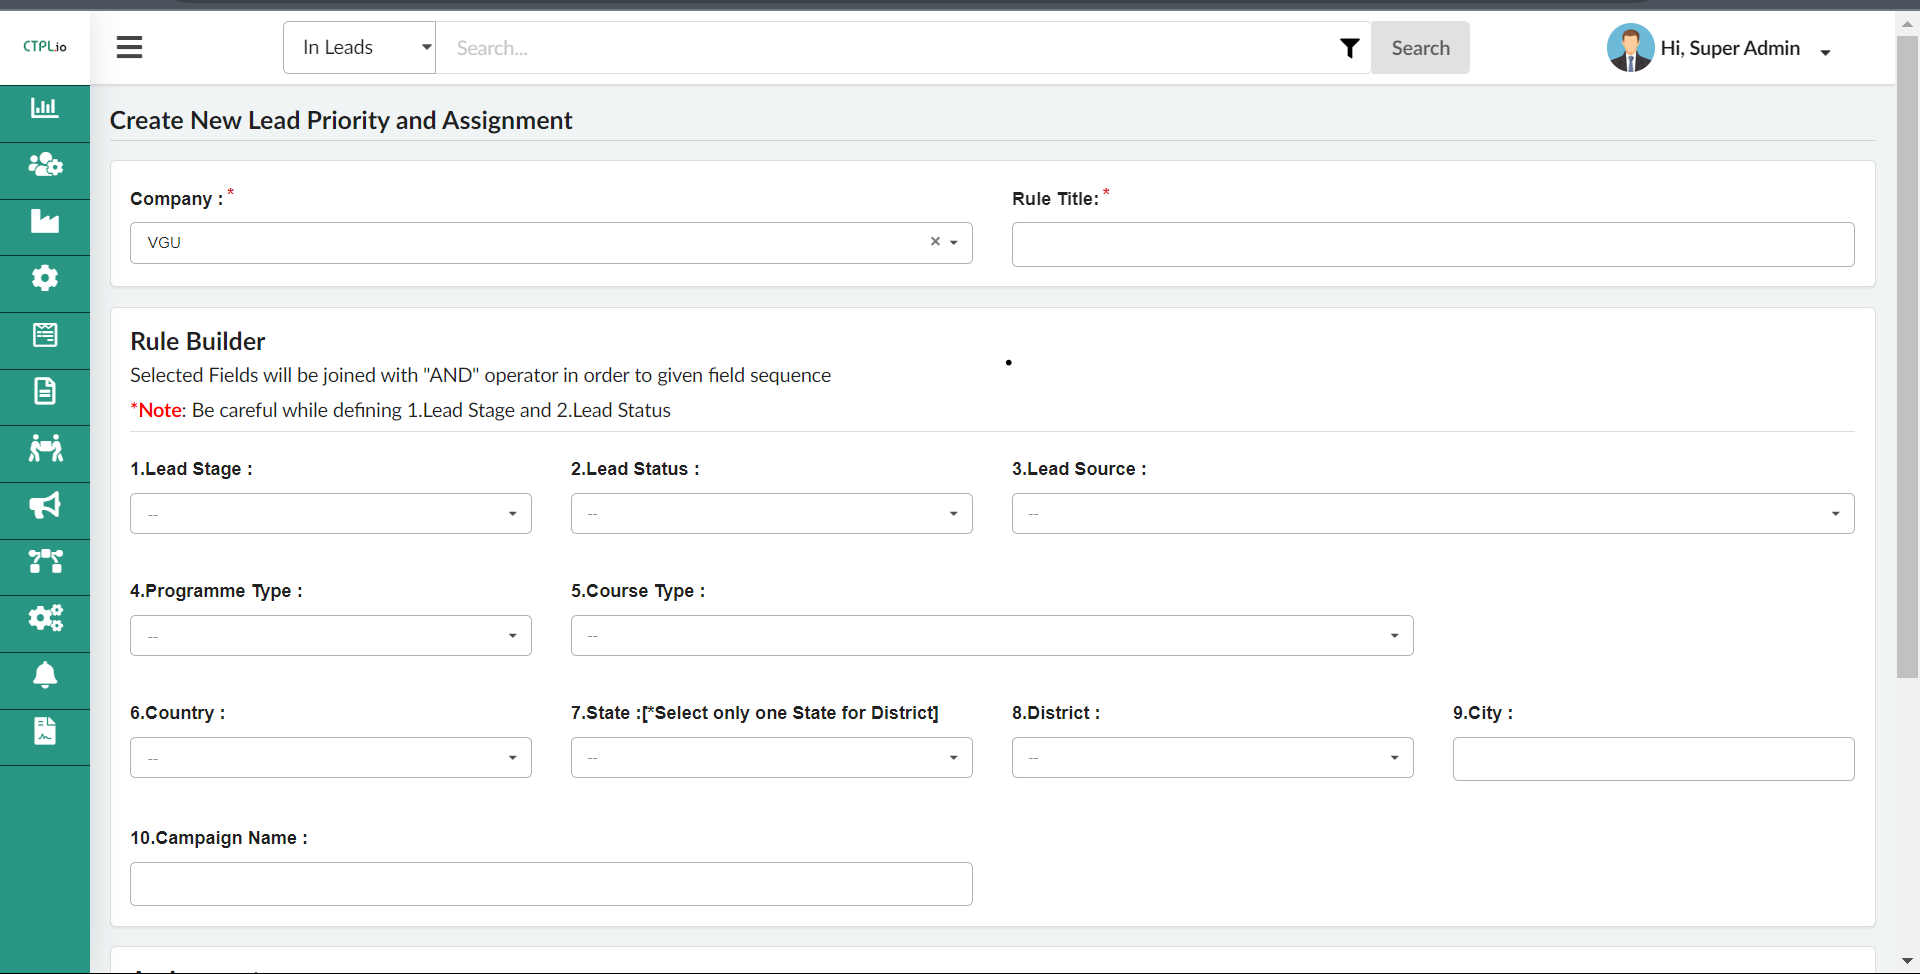
Creating a New Rule Click on the "+" button to add a new assignment rule. Fill in the rule details, including: Execution sequence Rule title Lead stage Lead status Lead source Program type Course type Country State Assign to team Click "Submit" to save the new rule.
-
Enabling and Disabling Rules Locate the rule you want to enable or disable. Click on the tick mark button to enable the rule. Similarly, click on the cross mark button to disable the rule.
-
Deleting a Rule Find the rule you wish to delete. Click on the delete button next to the rule details. Confirm the deletion when prompted.
- Accessing Manage Users and Roles
Log in to the application using your credentials.
Navigate to the main menu.
Click on the "Manage Users" option.

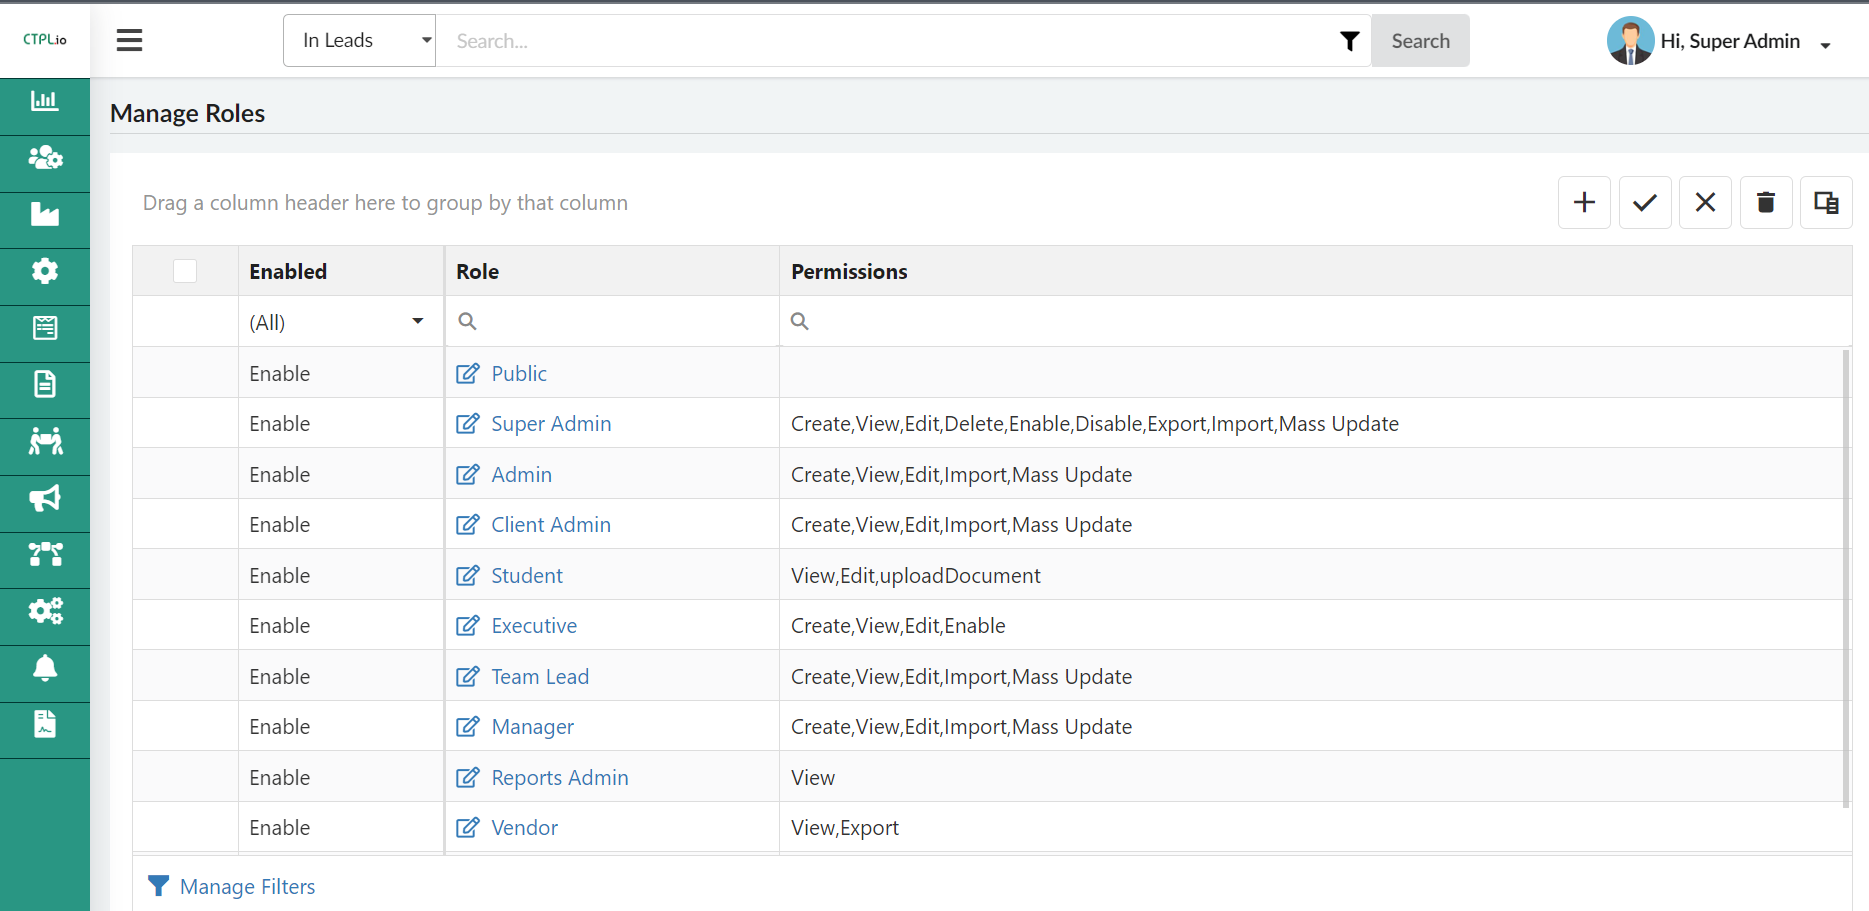
- Creating a New Role In the "Manage Access" section, locate and click on "Manage Roles." Click on the "+ New Role" button to create a new role. In the page that opens, add a role name in the provided field. Choose a parent role, if applicable. Select the permissions you want to assign to this role. Click "Submit" to save the new role.
- Editing and Deleting Roles In the "Manage Roles" section, find the role you want to edit. Click on the "Edit" button next to the role's details. Make necessary changes to the role name, parent role, or permissions. Click "Save" to update the role's information. To delete a role, locate the role and click the "Delete" button. Confirm the deletion when prompted.
- Enabling and Disabling Roles
Find the role you want to enable or disable in the "Manage Roles" section.
Click on the tick mark button to enable the role.
Alternatively, click on the cross mark button to disable the role.
- Accessing Manage Access and Users Log in to the application using your credentials. Navigate to the main menu. Click on the "Manage Access" option.
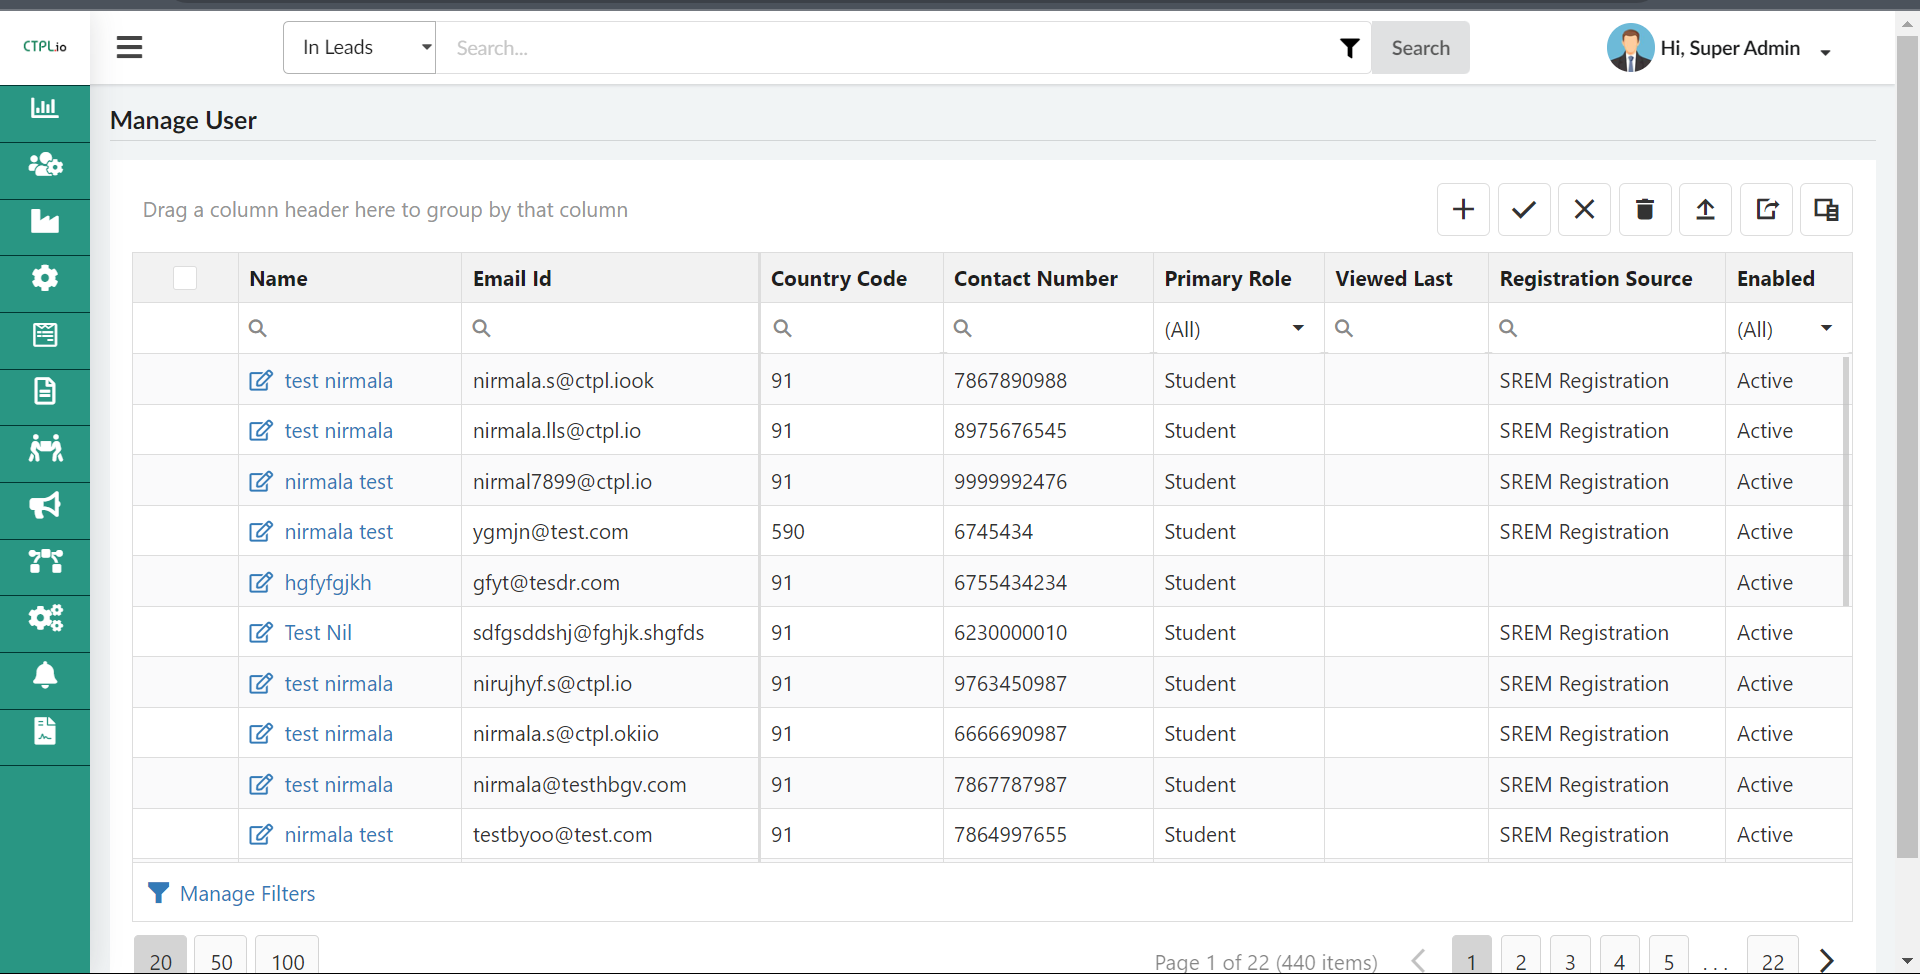
- Viewing Existing Users
In the "Manage Access" section, click on "Manage Users."
A page will open displaying all the users present in the CRM.
Here, you can see essential user information such as name, email, client name, roles, and more.
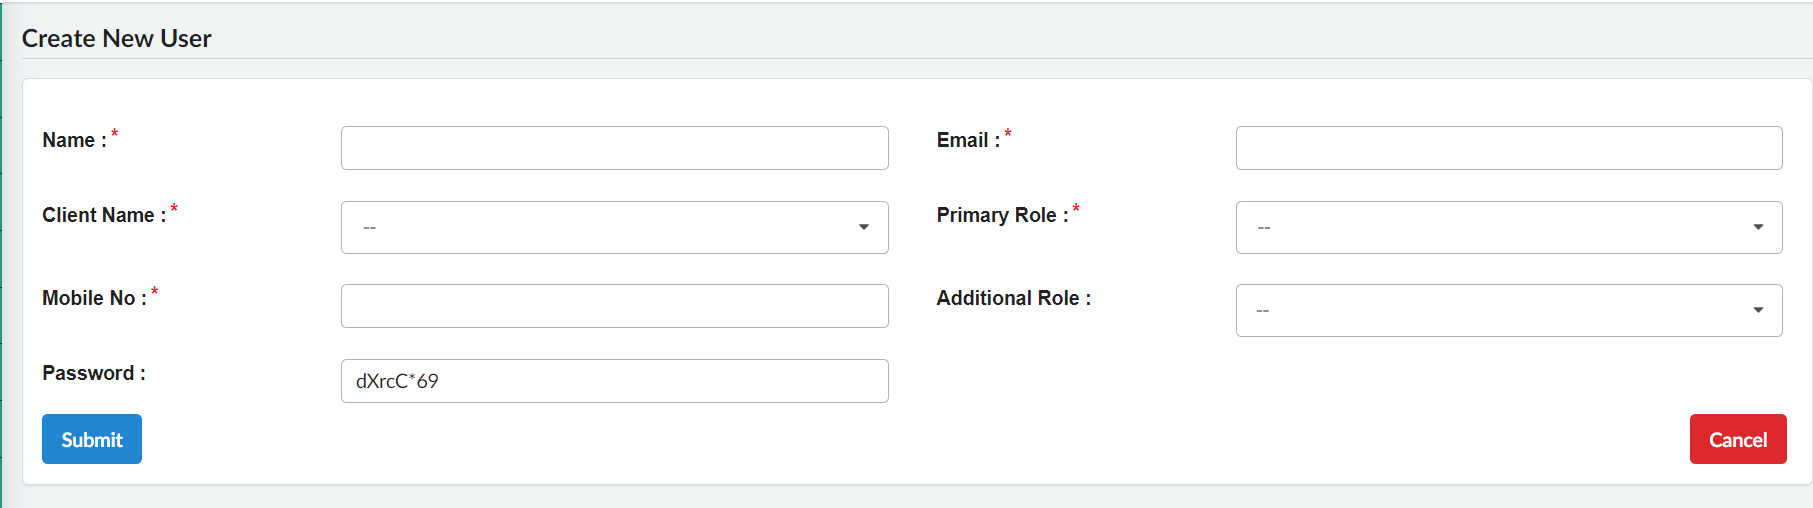
- Creating a New User In the "Manage Users" section, locate and click on the "+ New User" button. On the page that appears, provide the following details: Name of the user Email address Client name Primary role Mobile number Additional role (if applicable) Password Click "Save" to create the new user account.
- Editing and Deleting Users
In the "Manage Users" section, find the user you want to edit.
Click on the "Edit" button next to the user's details.
Make necessary changes to the user's information.
Click "Save" to update the user's account.
To delete a user, locate the user and click the "Delete" button.
Confirm the deletion when prompted.
- Accessing Manage Users and Roles
Log in to the application using your credentials.
Navigate to the main menu.
Click on the "Manage Users" option.
-
Accessing Vendor Management
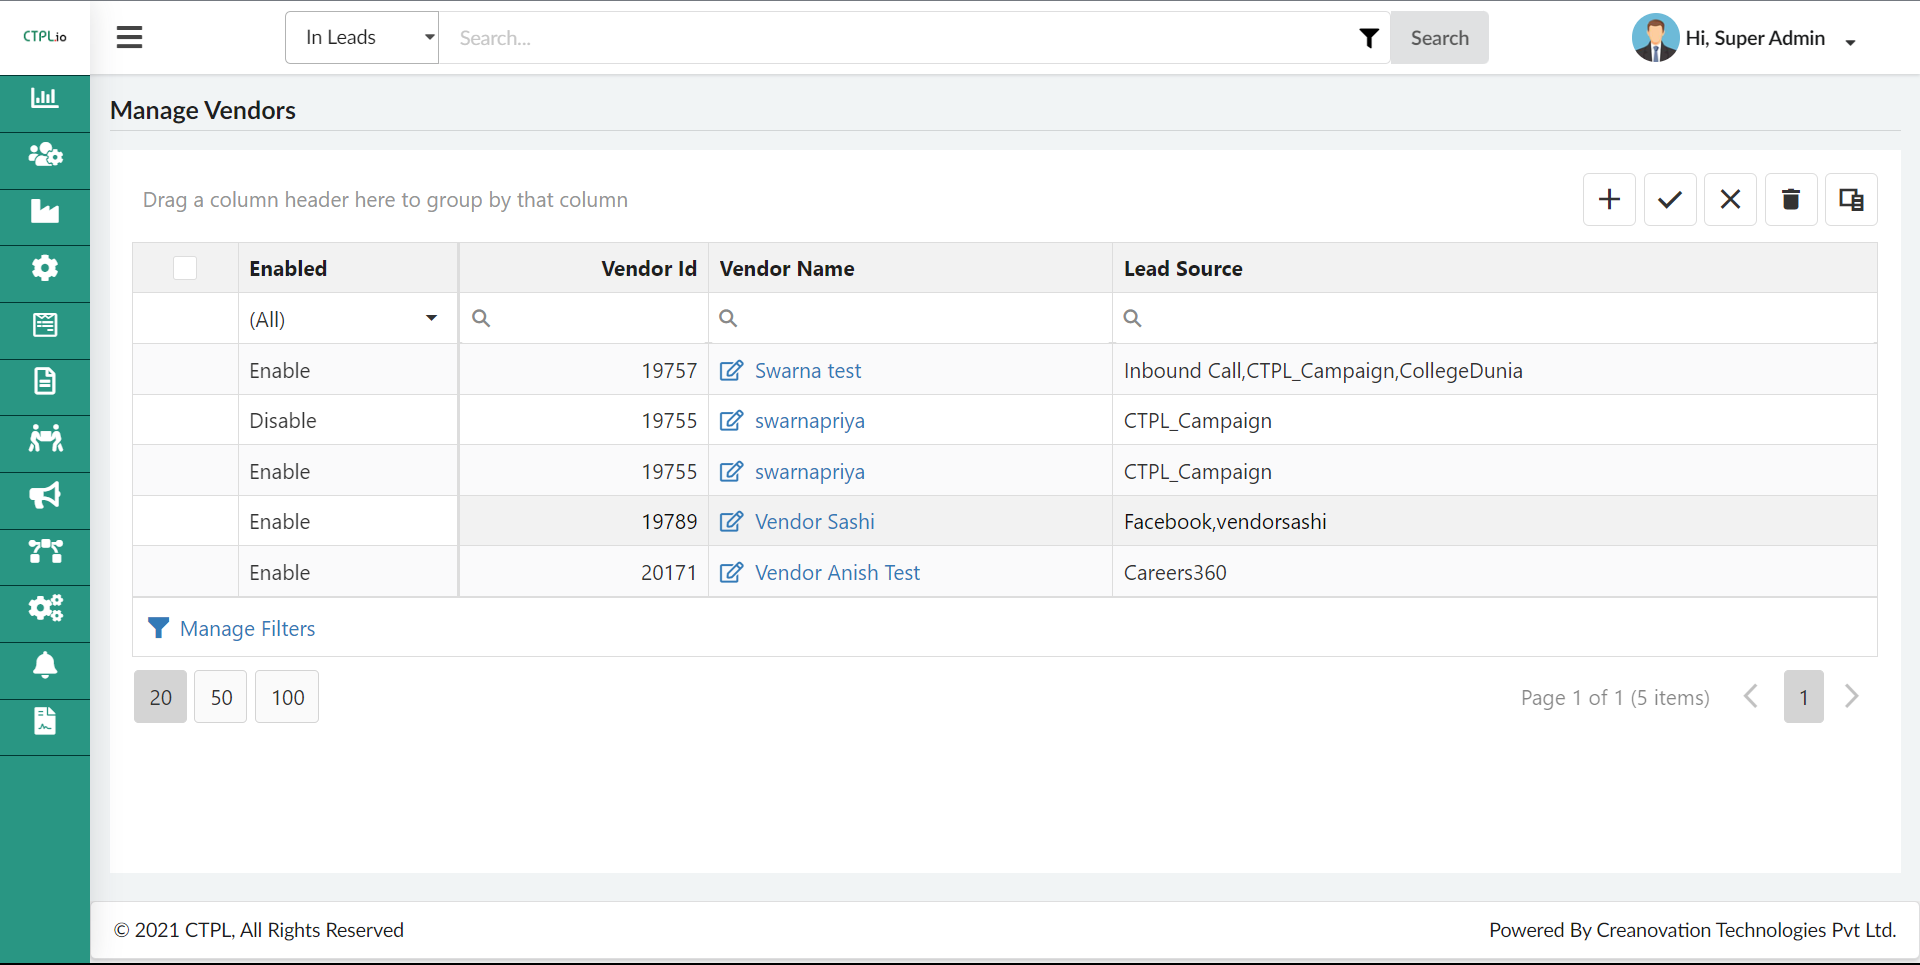
- Once logged in, you will see the dashboard. Look for the "Manage Vendors" option in the CRM.
- Click on the "Manage Vendors" option to access the vendor management page. As seen in the above image.
-
Creating a New Vendor
- Click the "+" Button: On the "Manage Vendors" page, you will find a "+" button. Click this button to initiate the vendor setup process.
- This page gets open for setup.
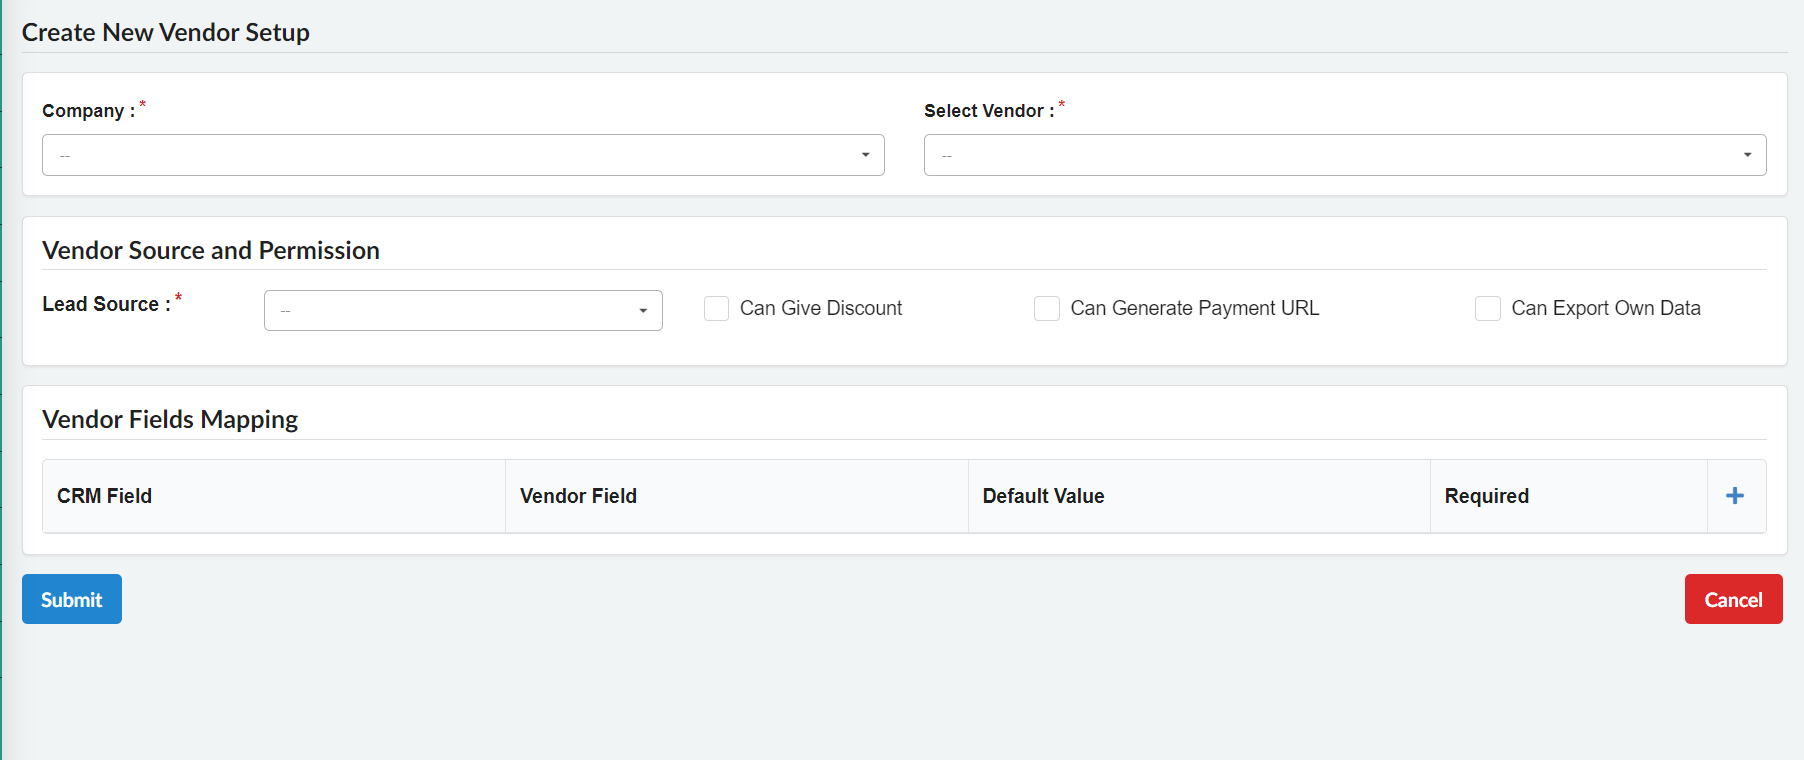
- Select Company: In the vendor setup page, you will see a dropdown menu to select the company associated with the vendor. Choose the appropriate company from the list.
- Choose Vendor Name: From the dropdown menu, select the vendor name you created from manage users.
- If the vendor name is not there you need to create a user and assign the role as “vendor” to that user, to make it appear in the selected vendor dropdown.
-
When creating a vendor, you will need to assign various permissions. Here's how:
- Lead Source Selection: Choose the lead source from which the vendor will receive leads. Use the provided dropdown menu to make your selection.
- Discount Permission: Toggle the checkbox to grant or deny the vendor the ability to offer discounts.
- Payment URL Generation: Use the checkbox to specify whether the vendor can generate payment URLs.
- Lead Data Export: Decide if the vendor can export their lead data by toggling the respective checkbox.
-
Vendor field mapping allows you to align vendor-specific fields with CRM fields. Follow these steps to configure field mapping
- Access Vendor Field Mapping: After setting permissions, scroll down on the vendor setup page to find the "Vendor Field Mapping" section.
- Map Fields: In this section, you will see a list of vendor-specific fields and corresponding CRM fields. Use the provided dropdown menus to map each vendor field to the appropriate CRM field.
- Save Changes: Ensure you save your field mapping configurations before exiting the page.
-
Enabling, Disabling, and Deleting Vendor Setups
- Locate the Enabled Row: On the "Manage Vendors" page, find the row corresponding to the active vendor setup you want to disable.
- Select the Row: Click on the row to select it.
- Disable the Row: Once the row is selected, look for the cross mark button. Click this button to disable the row. The vendor setup will be deactivated.
- Locate the Disabled Row: On the "Manage Vendors" page, you will see a list of vendor setups. Locate the row corresponding to the vendor setup you want to enable.
- Select the Row: Click on the row to select it.
- Enable the Row: Once the row is selected, look for the tick mark button. Click this button to enable the row. The vendor setup will now be active.
- Locate the Row to Delete: On the "Manage Vendors" page, identify the row corresponding to the vendor setup you want to delete.
- Select the Row: Click on the row to select it.
- Delete the Row: Once the row is selected, look for the delete button. Click this button to delete the vendor setup permanently.